Introduction
We often come across situations where we are required to send a text message from our Android app. In this article we will explore all possible ways to achieve this simple yet very useful task.Download Source Code - 25 KB
Background
There are two possible ways to send a text message from an Android app1. The first way is to send it programmatically from your application.
2. The second way is to send it by invoking the built-in SMS application.
In this article we will explore both the scenarios one by one.
* If you are new to Android app development, do refer to the Demo Project section of this article for some useful tips.
1. Sending a SMS programmatically from your application
Include the following permission in yourAndroidManifest.xml file - <uses-permission android:name="android.permission.SEND_SMS" />
Import the package - import android.telephony.SmsManager;
Code to send a SMS -
public void sendSMS() {
    String phoneNumber = "0123456789";
    String message = "Hello World!";

    SmsManager smsManager = SmsManager.getDefault();
    smsManager.sendTextMessage(phoneNumber, null, message, null, null);
}
The method sendTextMessage of class SmsManager sends a text based SMS.
Method Detail
public void sendTextMessage(String destinationAddress, String scAddress, String text, PendingIntent sentIntent, PendingIntent deliveryIntent)
Details about the parameters that the method accepts can be found here.
If you use the code above you will able to send messages with length less than or equal to 160 characters only.
Code to send a long SMS -
public void sendLongSMS() {

    String phoneNumber = "0123456789";
    String message = "Hello World! Now we are going to demonstrate " +
            "how to send a message with more than 160 characters from your Android application.";

    SmsManager smsManager = SmsManager.getDefault();
    ArrayList<String> parts = smsManager.divideMessage(message);
    smsManager.sendMultipartTextMessage(phoneNumber, null, parts, null, null);
}
The method sendMultipartTextMessage of class SmsManager sends a multi-part text based SMSMethod Detail
public void sendMultipartTextMessage(String destinationAddress, String scAddress, ArrayList<String> parts, ArrayList<PendingIntent> sentIntents, ArrayList<PendingIntent> deliveryIntents)
Details about the parameters that the method accepts can be found here
Note
The method
divideMessage of class SmsManager divides the message text into several smaller fragments of size 160 characters or less.* Refer to the Points of Interest section of this article for a useful tip.
2. Send a SMS by invoking the built-in SMS application using Intents.
To invoke the SMS application via intents we have to do the following:- Set the action to
ACTION_VIEW
- Set the mime type to
vnd.android-dir/mms-sms
- Add the text to send by adding an extra String with the key
sms_body
- Add the phone number of the recipient to whom you wish to send the message by adding an extra String with the key
address
Note:
- The last two steps are optional, if you don't wish to specify the message text or the recipients you can ignore these steps.
- If you wish to set multiple recipients use semi-colon ';' as the separator in the string passed as the
addressCode to send a SMS using Intents
public void invokeSMSApp() {
        Intent smsIntent = new Intent(Intent.ACTION_VIEW);

        smsIntent.putExtra("sms_body", "Hello World!");
        smsIntent.putExtra("address", "0123456789");
        smsIntent.setType("vnd.android-dir/mms-sms");

        startActivity(smsIntent);
}
Points of Interest
If you choose to send messages programmatically and wish to add the message sent from your application in the native 'Messages' application of Android in the 'Sent' folder, here is the code to achieve it using Content providers -Code to save a SMS in 'Sent' folder of native 'Messages' application
Include the following permission in yourAndroidManifest.xml file - <uses-permission android:name="android.permission.WRITE_SMS" />
<uses-permission android:name="android.permission.READ_SMS" />
You will have to add both WRITE_SMS and READ_SMS permissions.Add the following imports -
    import android.net.Uri;
    import android.content.ContentValues;
Insert the below code where you wish to perform the operation - ContentValues values = new ContentValues();
values.put("address", "0123456789");
values.put("body", "Hello World!");
getContentResolver().insert(Uri.parse("content://sms/sent"), values);
Demo Project
I have created a demo project which implements all the scenarios as discussed in this article.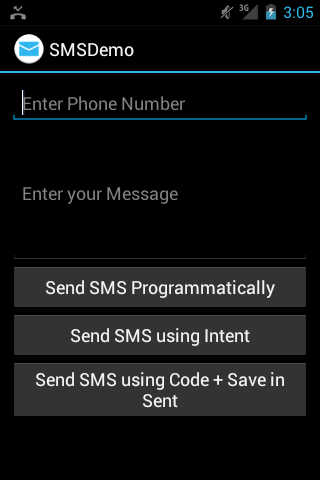
EditText widget for the Phone Number and Message input. Here I'd like to mention two XML attributes that I have used -android:hintThis string is displayed as a hint to the user when the field is empty. This will give your application a more native look and feel.android:inputType="phone"(for Phone Number field) This signals the input method (IME) that this field should accept only valid Phone Numbers. This will save you from validating user input.
Which way to go....
Both the ways have their own set of pros and cons. If you decide to use Intents to send text messages from your application then no additional permissions are required but it will become a two step process, for instance if the user presses any button in your app to send SMS the intent will be displayed where he/she will have to press send; whereas if you decide to do it programitically you might also have to check for the result.Hope this small article helps someone out there.
Happy Coding!
History
- September 21, 2012; First version
License
This article, along with any associated source code and files, is licensed under The Code Project Open License (CPOL)
About the Author
 |
gupta.avinash
Architect
India

Member
|


i am exactly doing same to send sms to premium number programatically, but getting below mention popup and i am not getting the way to handle cancel/send button, could you please help me ??
http://stackoverflow.com/questions/19402043/issue-in-sending-sms-using-smsmanager-sendtextmanager-on-android
Nice idea,keep sharing your ideas with us.i hope this information's will be helpful for the new learners.
Android Training in Chennai
Android Training in Tambaram
JAVA Training in Chennai
Python Training in Chennai
Hadoop Training in Chennai
IOS Training in Chennai
Android Training in Chennai
Android Training in T Nagar